How to Remove Chrome Extensions
a) Click the three dots in the top right of your browser.
b) Click ‘More Tools’ then ‘Extensions’
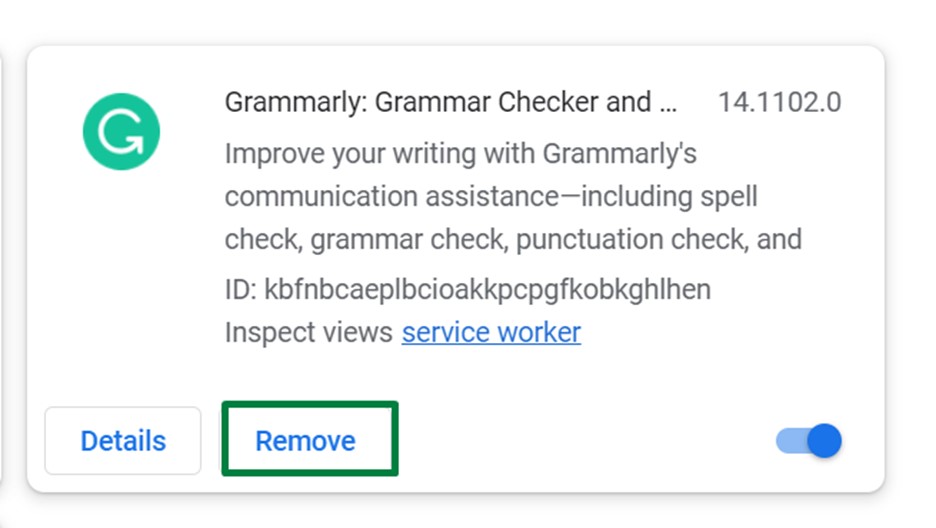
c) Click ‘Remove’ next to the extension that you wish to remove.
How to Remove Chrome Extensions Installed by Administrator (The Right Way)
Are you trying to remove Chrome extensions installed by your administrator but don't have the necessary permissions? If so, you've come to the right place! We'll provide a step-by-step guide on removing Chrome extensions installed by your administrator, even if you're not the admin! With our simple guide, you can quickly and easily remove any Chrome extensions installed by your administrator. So, let's get started!
Find the Extension in Chrome
1. Launch Chrome. It is recognizable by its unique design: a yellow, green, and red orb with a blue core.
2. Accessing "chrome://extensions" from the URL bar will bring up a list of all the extensions currently installed in Chrome, regardless of their enabled/disabled status.

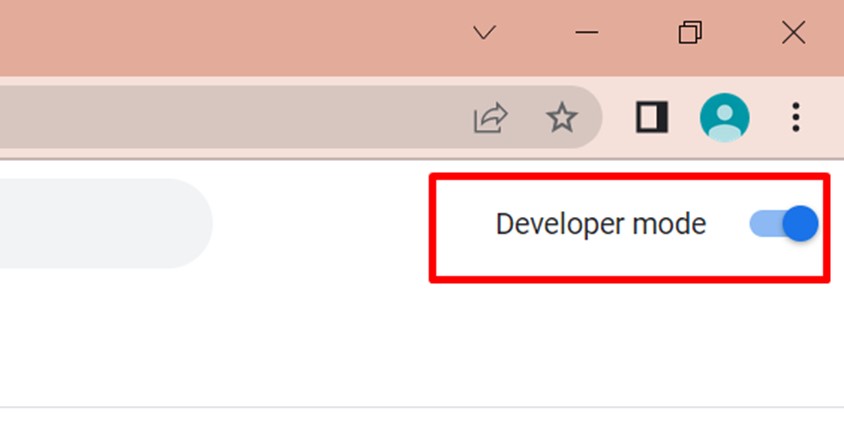
3. To turn on Windows Switch, click the toggle next to "Developer mode." It should be light blue and pointing to the right, indicating active.
You will also observe that each extension tile includes additional information.
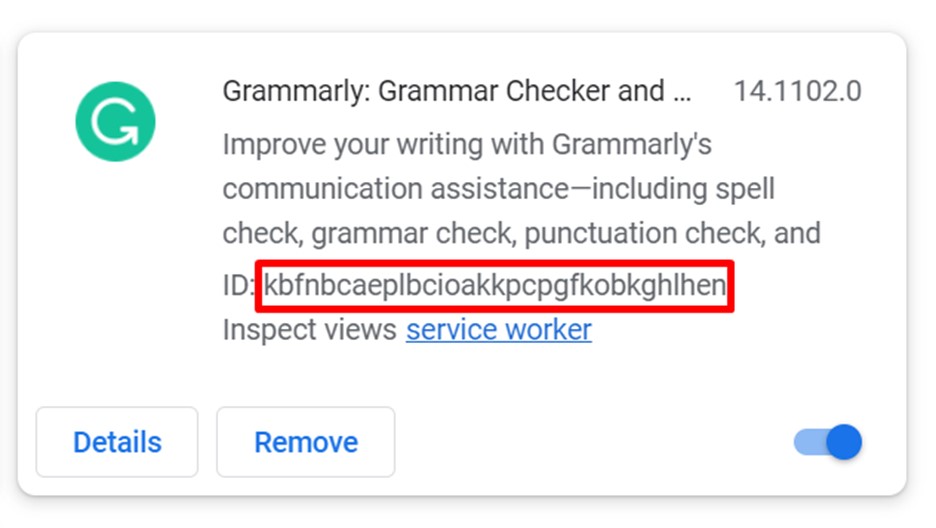
4. Highlight the ID next to any extensions imposed via policy and press Ctrl + C to store it on your clipboard. Afterward, you can easily paste the ID in Notepad or a text-based program like Sticky Notes.
Remove the Extension ID in the Registry
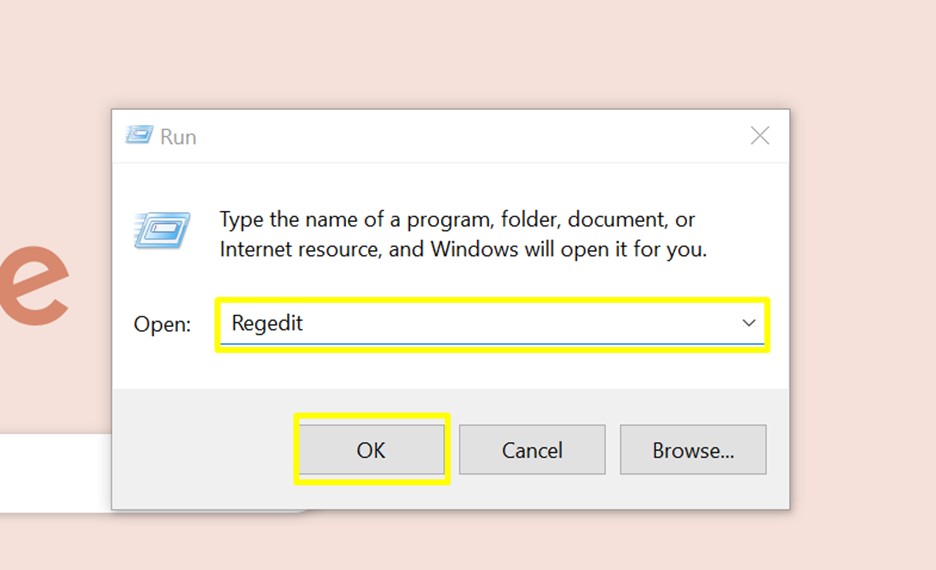
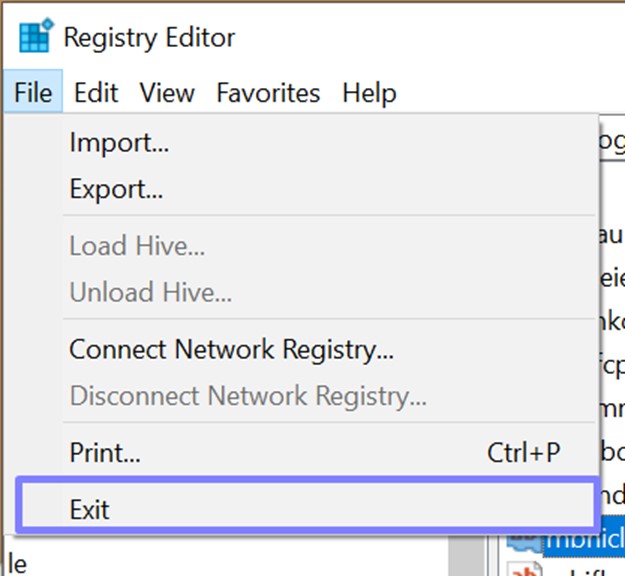
1. To open the Registry Editor, click the Start menu icon, then go to the Run function and type "Regedit." Finally, click on the app result that appears. Before running the app, you'll be prompted to allow the "Registry Editor" program to change your device. For the best results, ensure to create a backup beforehand, as incorrect alterations in the Registry can result in the unavailability of your computer. To proceed, press "Yes" in the pop-up.
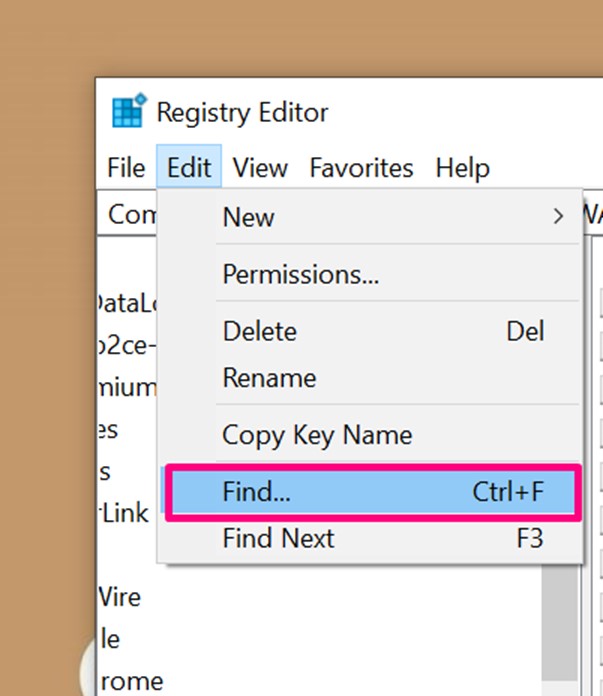
2. To utilize the "Find" window, you can click "Edit" in the uppermost section of the window and select the "Find" option near the bottom of the resulting menu. An alternate method to access the "Find" window is to press "Ctrl + F" when the Registry Editor is open.
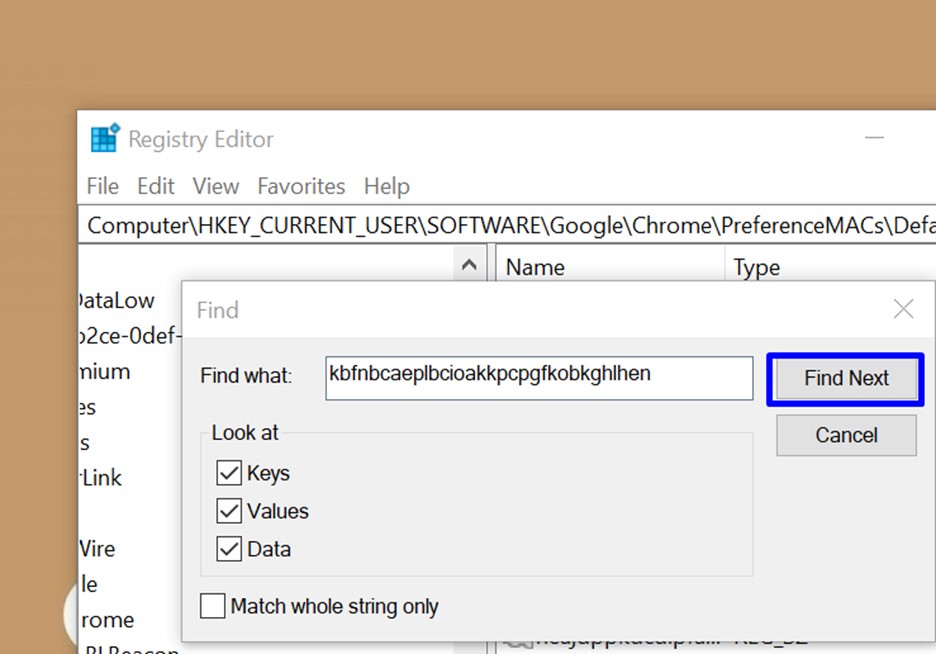
3. Ensure your cursor is within the text field before using the shortcut Ctrl + V to paste the extension ID. Once you hit Find Next, Registry Editor can detect your inserted ID.
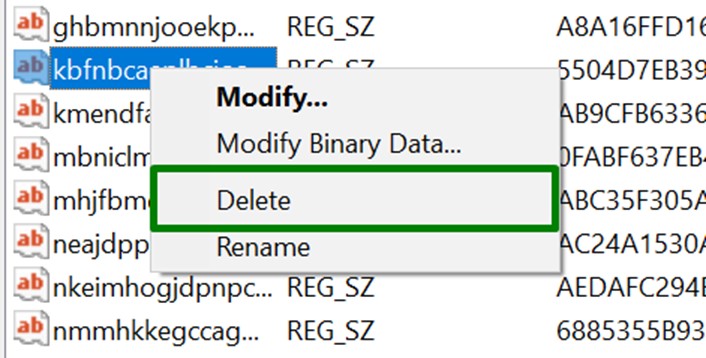
4. In the right panel of the window, locate the value by its ID and right-click on it to select Delete. Don't accidentally right-click the data value; that would only remove the data string.

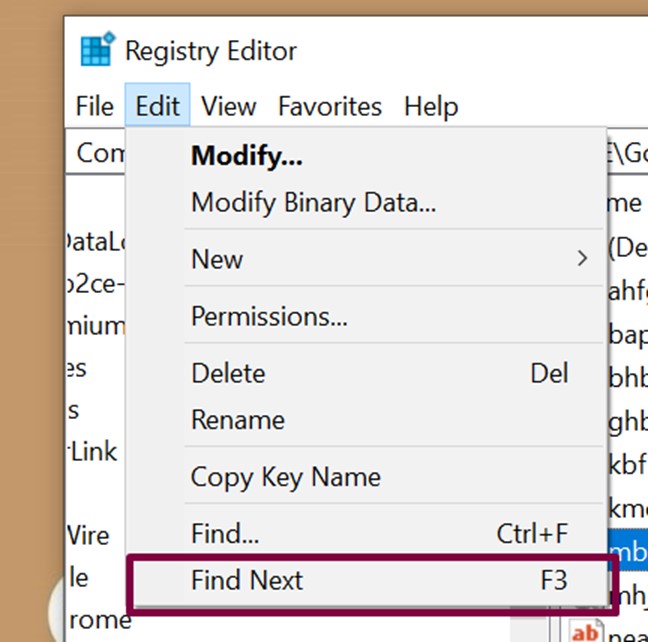
5. To initiate the "Find Next" feature, click on the "Edit" option located at the top of the window and scroll down to select "Find Next." An alternate way to do so is by pressing the F3 key.
6. Access the value associated with the specific ID by right-clicking and selecting Delete. The correct entry should be found on the right-hand side of the window. Generally, you must delete two entries for the same ID, both of which can usually be located in the:
HKEY_USERS\Group Policy Objects\Machine\Software\Policies\Google\Chrome\ExtensionInstallForcelist HKEY_LOCAL_MACHINE\SOFTWARE\Policies\Google\Chrome\ExtensionInstallForcelist
7. To close Registry Editor, locate the X icon in the upper right corner of the window and click it. To restart Chrome, exit it by clicking the X icon, and launch the web browser from your Start menu, Desktop, or Taskbar.
Delete the Extension from Chrome
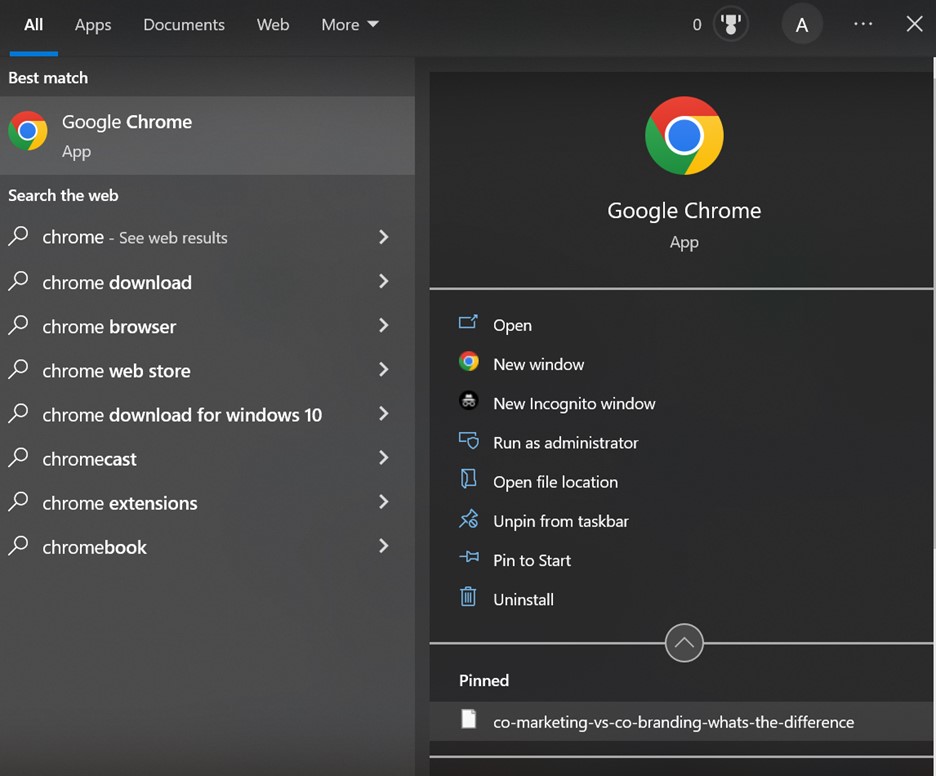
1. Open Chrome, which appears like a yellow, green, and red orb surrounding a blue center. Once you have made modifications to the Registry, the extension can be eliminated from Chrome as any other extension.
 1
1
2. Accessing the URL bar and entering "chrome://extensions" will allow you to view all the extensions you have installed on Chrome, even those currently disabled.

3. To delete the desired extension, select the Remove option next to it. Confirm that it is the same ID you have deleted from the Registry Editor for the deletion from Chrome to be successful. To be safe, an anti-malware scan should be performed to check for any potentially malicious files.